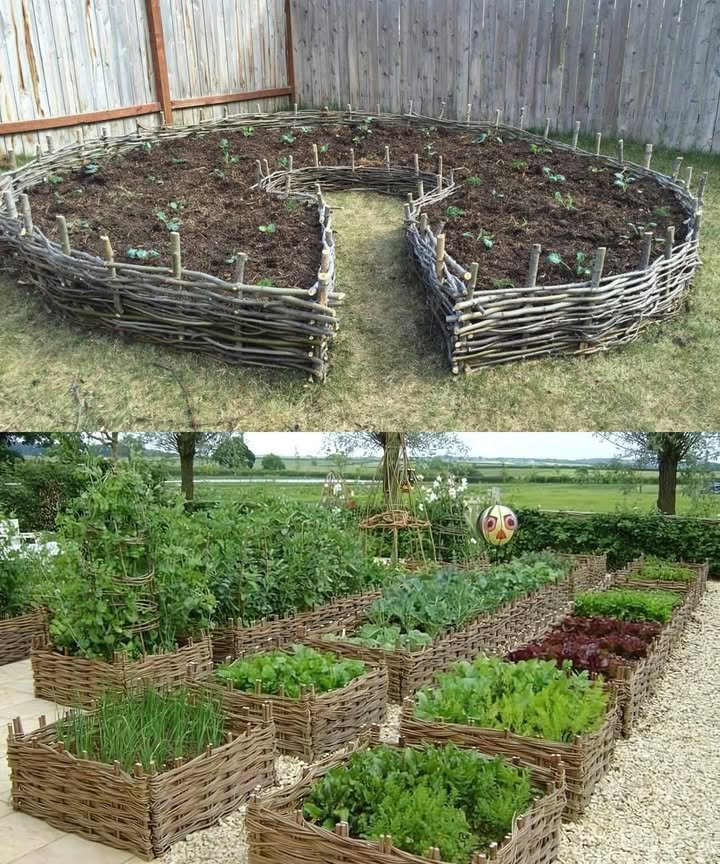
Step 1: Gather Materials
- Flexible branches (willow, hazel, etc.)
- Wooden stakes (1-2 inches in diameter)
- String or twine
- Garden soil or compost
- Plants or seeds
Step 2: Choose a Location
- Select a sunny spot with at least 6-8 hours of sunlight.
- Ensure the area is flat with good drainage.
Step 3: Plan the Bed Size and Shape
- Decide on the size (common dimensions: 4 feet wide and 6-8 feet long).
- Mark the outline with string or twine.
Step 4: Install the Stakes
- Drive stakes into the ground along the marked outline, spaced 1-2 feet apart.
- Ensure stakes are firmly anchored and stand 12-18 inches above ground.
Step 5: Weave the Wattle
- Weave branches in and out between the stakes, starting at one end.
- Alternate the branches to create a sturdy structure.
- Push branches down tightly and trim excess length.
Step 6: Fill the Bed with Soil
- Fill the bed with high-quality garden soil or compost.
- Ensure soil is evenly distributed, just below the top of the wattle walls.
Step 7: Plant Your Garden
- Plant vegetables, herbs, or flowers according to spacing requirements.
- Water thoroughly after planting to help roots establish.
Step 8: Maintain Your Wattle Garden Bed
- Regularly check for loose branches and reweave or replace as needed.
- Keep soil consistently moist but not waterlogged.
- Mulch around plants to retain moisture and suppress weeds.
- Benefits of a Wattle Raised Garden Bed
- Eco-Friendly: Utilizes natural, renewable materials.
- Rustic Charm: Adds a beautiful, rustic aesthetic.
- Durable: Strong and long-lasting structure.
- Sustainable: Promotes sustainable gardening practices.
- By following these steps, you can create a wattle raised garden bed that enhances the beauty and sustainability