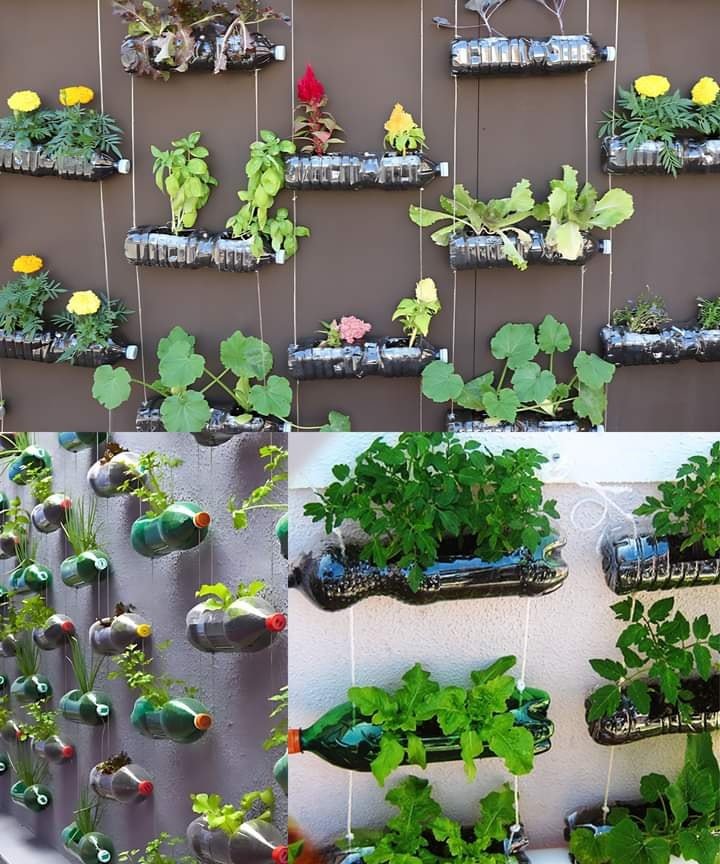
Materials Needed
- Plastic bottles (1 or 2-liter)
- Sharp scissors or craft knife
- Twine or string
- Wooden dowels or stakes (optional)
- Potting soil
- Plants or seeds
- Drill or sharp tool for making holes
- Spray paint (optional)
Steps to Create Your Vertical Garden
Prepare the Bottles
- Clean the bottles thoroughly.
- Cut a rectangular opening on one side of each bottle.
- Drill or poke small drainage holes in the bottom.
Assemble the Vertical Garden
Hanging Method:
- Drill two holes near the top and two near the bottom of each bottle.
- Thread twine or string through the holes and knot it to secure the bottles.
- Hang the bottles in your desired arrangement.
Stacking Method:
- Drill holes through the sides of the bottles.
- Thread the bottles onto wooden dowels or stakes to secure them in place.
Add Soil and Plants
- Fill each bottle with potting soil up to the cut opening.
- Place plants or seeds into the soil, compacting gently around them.
Watering System
- Manual Watering: Water each bottle to keep the soil moist but not waterlogged.
- Drip Irrigation (Optional): Set up a drip system using a larger bottle with small holes at the top for slow, consistent watering.
Steps to Care for Your Vertical Garden
Watering
- Water regularly to maintain consistent soil moisture.
- Ensure proper drainage to prevent root rot.
Sunlight
Place the garden in a location with at least 6 hours of sunlight daily.
Adjust the location if plants are not thriving.
Fertilizing
Use a balanced liquid fertilizer or slow-release pellets.
Fertilize every 4-6 weeks according to the product instructions.
Pruning and Maintenance
- Prune plants regularly to encourage healthy growth and prevent overcrowding.
- Monitor for pests and treat with appropriate insecticides if needed.
Rotating Plants
- Rotate bottles occasionally for even light exposure.
- Swap plants seasonally to keep the garden fresh and vibrant.